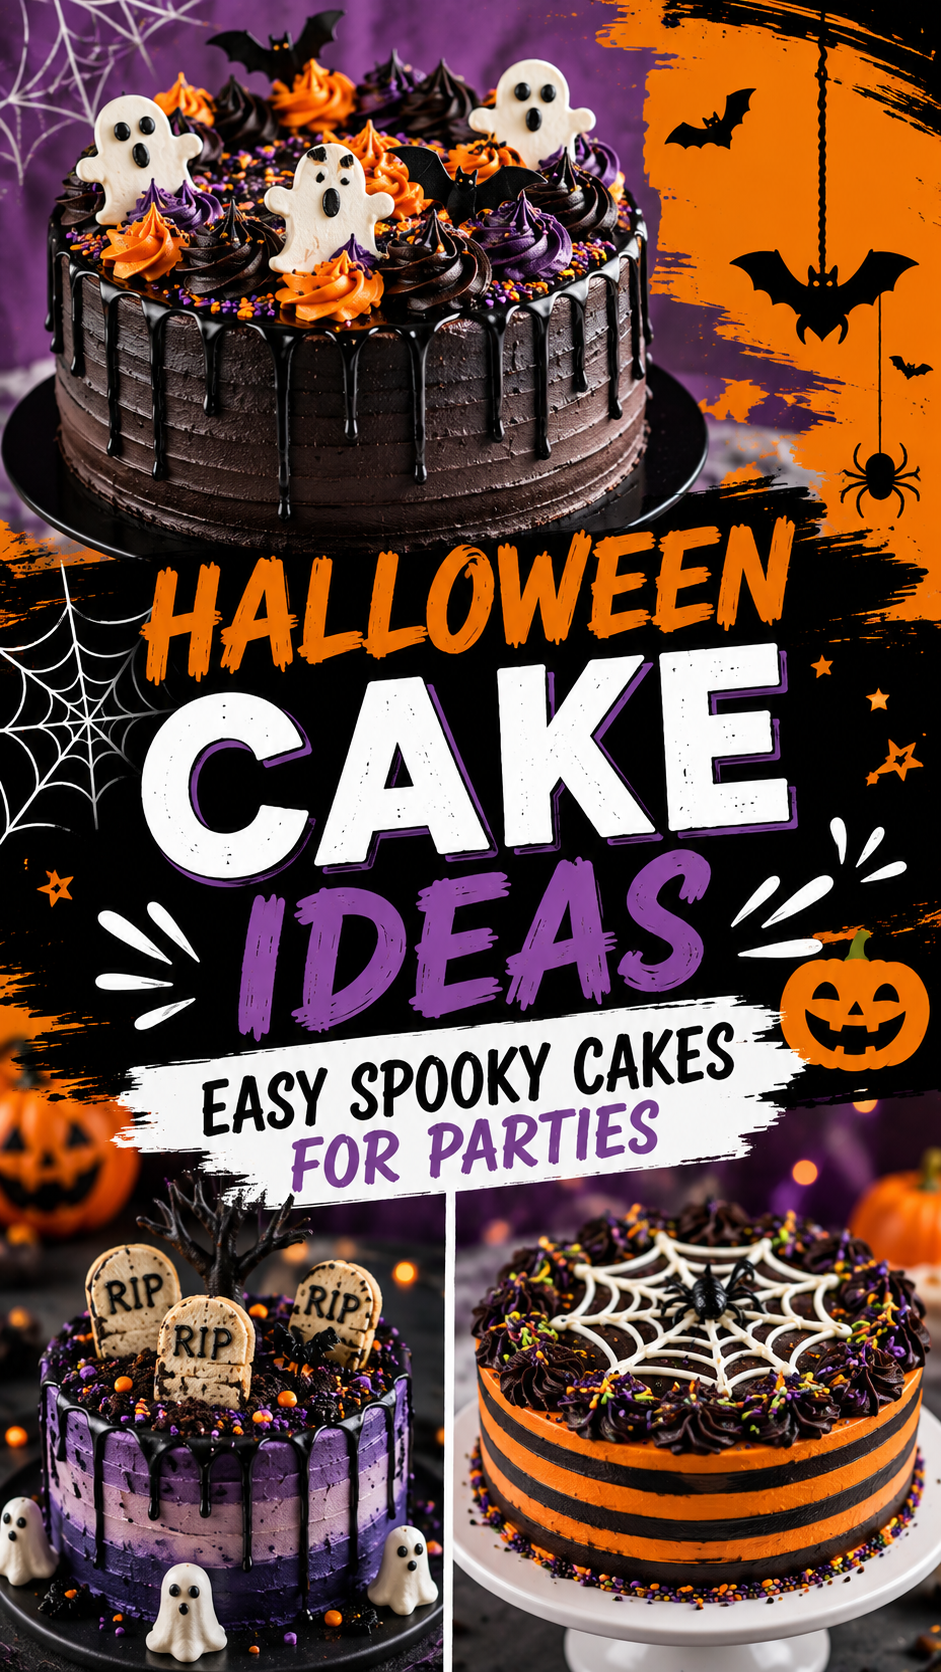
Halloween cakes get to break a few normal baking rules.
The frosting can drip down the sides. The decorations can look crooked. Crumbs can become graveyard dirt. A badly piped line can suddenly become part of a spiderweb.
For once, perfection is almost suspicious.
These Halloween cake ideas are designed for home bakers who want a party-worthy dessert without spending an afternoon constructing something that requires architectural approval.
We’re making five different cakes: a spiderweb chocolate cake, ghost cake, monster drip cake, graveyard cake, and pumpkin patch cake.
They all start with familiar cake and frosting techniques. The Halloween part comes from a few easy decorating tricks.
1. Spiderweb Chocolate Cake
This is the cake to make when you want something spooky without covering every inch in candy.
Dark chocolate frosting creates the background while a simple white chocolate web gives it the Halloween look.
It can be neat and dramatic or slightly messy.
Spiders have never issued piping guidelines.
What You’ll Need
For the chocolate cake:
- 1 3/4 cups all-purpose flour
- 1 3/4 cups granulated sugar
- 3/4 cup unsweetened cocoa powder
- 1 1/2 teaspoons baking powder
- 1 1/2 teaspoons baking soda
- 1 teaspoon salt
- 2 large eggs
- 1 cup buttermilk
- 1/2 cup vegetable oil
- 2 teaspoons vanilla extract
- 1 cup hot coffee or hot water
For the frosting:
- 1 cup unsalted butter, softened
- 3 1/2 cups powdered sugar
- 3/4 cup unsweetened cocoa powder
- 1/3 cup heavy cream or milk
- 2 teaspoons vanilla
- Pinch of salt
For the web:
- 1/2 cup white chocolate
- Decorative spider, optional
Bake the Cake
Heat the oven to 350°F.
Grease and line two 8-inch round cake pans.
Whisk flour, sugar, cocoa powder, baking powder, baking soda, and salt.
In another bowl, combine eggs, buttermilk, oil, and vanilla.
Add the wet ingredients to the dry ingredients.
Slowly stir in the hot coffee.
The batter will be thin.
Divide between the pans.
Bake for approximately 28 to 34 minutes, until a toothpick inserted near the center comes out clean or with a few moist crumbs.
Cool in the pans briefly, then transfer to racks.
Let the layers cool completely.
Make the Chocolate Frosting
Beat the softened butter until smooth.
Gradually add powdered sugar and cocoa powder.
Add cream, vanilla, and salt.
Beat until fluffy.
Add a little more cream if needed.
Make the Spiderweb
Place one cake layer on your serving plate.
Spread frosting over it.
Add the second layer.
Cover the top and sides with chocolate frosting.
Melt the white chocolate gently.
Transfer it to a piping bag.
Pipe a small circle in the center of the cake.
Pipe several larger circles around it.
Drag a toothpick from the center toward the outside edge.
Repeat all the way around.
The circles become a web.
Add a decorative spider to the serving platter if you like, keeping non-edible decorations clearly separate from portions being served.
2. Easy Ghost Cake
This cake relies on one very useful decorating principle:
A white blob with two dark eyes is immediately accepted as a ghost.
We should appreciate how little evidence Halloween requires.
What You’ll Need
For the vanilla cake:
- 2 1/2 cups all-purpose flour
- 2 1/2 teaspoons baking powder
- 1/2 teaspoon salt
- 3/4 cup unsalted butter, softened
- 1 3/4 cups granulated sugar
- 4 large eggs
- 1 tablespoon vanilla extract
- 1 cup whole milk
For the frosting:
- 1 1/2 cups unsalted butter, softened
- 5 cups powdered sugar
- 2 teaspoons vanilla extract
- 3 to 5 tablespoons heavy cream or milk
- Pinch of salt
For decorating:
- 1/2 cup dark chocolate chips
- White meringue cookies or large marshmallows, optional
Bake the Cake
Heat the oven to 350°F.
Grease and line two 8-inch round pans.
Whisk together flour, baking powder, and salt.
In another large bowl, beat butter and sugar until light and creamy.
Add the eggs one at a time.
Mix in vanilla.
Add the flour mixture and milk in alternating additions.
Mix only until combined.
Divide between the pans.
Bake for approximately 25 to 30 minutes, or until done.
Cool completely.
Frost the Cake
Beat butter until creamy.
Gradually beat in powdered sugar.
Add vanilla, salt, and enough cream to create a soft, spreadable frosting.
Fill and stack the cake layers.
Cover the cake with white frosting.
You do not need perfectly smooth sides.
A few soft swirls actually fit the ghost theme nicely.
Add the Ghosts
Transfer some remaining white frosting to a piping bag fitted with a large round tip.
Pipe tall swirls around the top of the cake.
Give each swirl two small dark chocolate eyes.
You can also use meringue cookies as ghosts.
Add them shortly before serving if they’re sensitive to moisture from the frosting.
The finished cake is simple, white, and immediately Halloween without requiring orange and purple frosting on every available surface.
3. Monster Drip Cake
This is the opposite of the ghost cake.
Bright frosting.
Chocolate drips.
Different-sized eyes.
A cake that looks like it may have opinions.
Monster cakes are especially good for children’s Halloween parties because the decorating does not need to be precise.
What You’ll Need
For the cake:
- 1 box chocolate or vanilla cake mix, plus ingredients required on the package
Or use either homemade cake recipe above.
For the frosting:
- 1 1/2 cups unsalted butter
- 5 cups powdered sugar
- 2 teaspoons vanilla
- 3 to 5 tablespoons cream
- Food coloring in green, purple, or orange
For the chocolate drip:
- 4 ounces semisweet chocolate
- 1/2 cup heavy cream
For decorating:
- Candy eyes in several sizes
- Halloween sprinkles
- Mini marshmallows, optional
- Chocolate sandwich cookies, optional
Bake and Cool
Prepare the cake according to the recipe or package directions.
Bake in two 8-inch pans.
Cool completely.
Make the Monster Frosting
Prepare the buttercream.
Tint it one Halloween color.
Green works especially well.
Fill and stack the cake.
Cover the entire outside with frosting.
It does not need to be perfectly smooth.
Make the Drip
Finely chop the chocolate.
Heat the cream until hot but not aggressively boiling.
Pour it over the chocolate.
Wait about 2 minutes.
Stir until smooth.
Let the ganache cool until it thickens enough to drip slowly.
Test one drip on the back of the cake.
If it races all the way to the plate, wait longer.
Once the consistency is right, spoon small amounts around the top edge.
Spread the remaining ganache over the top.
Give It a Face
Add candy eyes in different sizes.
One enormous eye can work.
So can seven tiny ones.
Monsters have remarkably flexible anatomy.
Add sprinkles or cookie pieces if desired.
Let the ganache set before serving.
4. Halloween Graveyard Cake
This is the cake for maximum spooky-party effect with fairly basic ingredients.
Chocolate cake becomes dirt.
Cookies become tombstones.
Crushed sandwich cookies become more dirt.
Apparently graveyard cake decorating involves a considerable amount of edible soil.
What You’ll Need
- 1 baked 9-by-13-inch chocolate cake
- 2 cups chocolate frosting
- 10 to 12 chocolate sandwich cookies
- 6 to 8 oval or rectangular cookies
- 1/2 cup dark chocolate, melted
- 1/2 cup green buttercream, optional
- Candy pumpkins, optional
- Gummy worms, optional
Build the Graveyard
Bake the chocolate cake in a 9-by-13-inch pan.
Cool completely.
Spread chocolate frosting across the top.
Crush the chocolate sandwich cookies.
Sprinkle the crumbs generously over the frosting.
Now prepare the tombstones.
Use melted dark chocolate to write short messages on the cookies.
Try:
- RIP
- BOO
Once the chocolate sets, push the bottom of each cookie gently into the cake.
Pipe small patches of green frosting around some tombstones if you want grass.
Add candy pumpkins or gummy worms.
Keep the decorations scattered rather than arranging everything in perfect rows.
A graveyard with municipal-level planning somehow feels less spooky.
Make It Even Easier
Skip the writing.
Simply insert plain chocolate cookies at different angles.
Once they’re surrounded by cookie crumbs and Halloween decorations, people will understand the assignment.
5. Pumpkin Patch Cake
Not every Halloween cake needs to look like something terrible happened to it.
This one is more cute than creepy.
Chocolate cake creates the “soil,” while little orange pumpkins cover the top.
What You’ll Need
- 1 baked 9-by-13-inch chocolate cake
- 2 cups chocolate frosting
- 10 chocolate sandwich cookies
- 2 cups orange buttercream
- 1/2 cup green buttercream
- Pretzel sticks, optional
- Green candy pieces, optional
Make the Pumpkin Patch
Cool the cake completely.
Spread chocolate frosting over the top.
Crush the sandwich cookies.
Sprinkle the crumbs over the frosting.
Transfer orange buttercream to a piping bag fitted with a large round or star tip.
Pipe small mounds around the cake.
These are your pumpkins.
Use green frosting to pipe small stems and vines.
If you want, use tiny pieces of pretzel as stems instead.
Keep the pumpkins different sizes.
Nature rarely produces twelve pumpkins with suspiciously identical measurements.
Pipe vines between them.
Add a few green leaves.
The finished cake is especially good for fall parties that need to feel Halloween-themed without going heavily into spiders and skeletons.
Quick Guide to the Five Cakes
| Cake | Skill Level | Decorating Time | Style |
|---|---|---|---|
| Spiderweb Cake | Easy | 20–30 min | Spooky and classic |
| Ghost Cake | Easy | 20–30 min | Cute and simple |
| Monster Drip Cake | Moderate | 30–40 min | Colorful and fun |
| Graveyard Cake | Easy | 20–30 min | Party centerpiece |
| Pumpkin Patch Cake | Easy | 25–35 min | Cute fall Halloween |
For beginners, start with the graveyard or ghost cake.
For kids, the monster cake is hard to beat.
For a slightly more grown-up Halloween table, the spiderweb cake works particularly well.
Tools You’ll Need
You do not need professional cake equipment, but a few basic tools make decorating easier.
- 8-inch round cake pans
- 9-by-13-inch baking pan
- Parchment paper
- Large mixing bowls
- Hand or stand mixer
- Rubber spatula
- Offset spatula
- Cooling racks
- Piping bags
- Large round piping tip
- Toothpicks
- Serrated knife
- Cake stand or serving plate
A rotating cake stand is helpful for frosting round cakes.
It is not required.
Your cake can remain stationary. It will cope.
Pro Tips for Halloween Cakes That Look Better With Less Work
Bake the cake ahead. Decorating is much easier when you’re not simultaneously waiting for warm cake layers to cool.
Chill the layers before frosting. Cool cake is firmer and produces fewer crumbs.
Use a crumb coat. Spread a thin first layer of frosting over the cake, chill it for 20 to 30 minutes, then add the final layer.
Don’t overcomplicate the theme. One recognizable Halloween element is often enough.
Test chocolate drips first. Ganache that is too warm runs straight down the cake. Ganache that is too cool barely moves.
Halloween decorating should look intentional.
It does not need to look professionally manufactured.
A slightly crooked tombstone may actually be helping.
How to Get Flat Cake Layers
Domed cakes are completely normal.
If you want a cleaner layer cake, let the cakes cool completely.
Use a serrated knife to carefully trim the rounded top.
Do not try to level a warm cake.
Warm cake is softer and more likely to tear.
Save the scraps.
Eat them.
This is commonly known as quality control.
How to Keep Cake Moist
The fastest way to dry out a cake is simply baking it too long.
Start checking near the earliest suggested baking time.
Insert a toothpick into the center.
You want it to come out clean or with a few moist crumbs, depending on the cake.
Once the cake is cool, keep it covered.
Unfrosted layers can be wrapped tightly until decorating.
Frosting also helps reduce moisture loss once the cake is assembled.
Easy Halloween Cake Color Palettes
You don’t need every Halloween color on one cake.
Choosing two or three usually gives you a cleaner result.
Classic Halloween
- Orange
- Black
- White
Monster Party
- Green
- Purple
- Black
Haunted House
- Black
- Gray
- Dark purple
Cute Halloween
- Orange
- White
- Light purple
Gothic Halloween
- Black
- Deep red
- White
Food coloring can deepen while buttercream sits, so add color gradually.
Dark black frosting in particular may need time to develop.
Easy Cake Decorating Shortcuts
Halloween is an excellent time to use store-bought decorations strategically.
Try:
- Candy eyes
- Chocolate sandwich cookies
- Marshmallows
- Meringue cookies
- Halloween sprinkles
- Candy pumpkins
- Gummy worms
- Pretzels
- Chocolate pieces
You can also use a boxed cake mix.
There is no Halloween committee checking whether you personally sifted the flour.
Spend your time on the part people will actually notice.
If the cake is moist and the decorating is fun, nobody at the party is conducting a flour audit.
Make-Ahead Timeline
Cake is one of the easier Halloween desserts to spread across several days.
Two Days Before
Bake the cake layers.
Cool completely.
Wrap them tightly.
Keep according to the recipe’s storage needs, or freeze the layers if that works better for your schedule.
One Day Before
Prepare buttercream.
Assemble and crumb-coat layer cakes.
You can also completely decorate sturdy designs such as the spiderweb or monster cake.
Store the cake appropriately for the frosting and filling used.
Party Day
Add delicate decorations such as:
- Cookie tombstones
- Meringue ghosts
- Pretzel stems
- Crisp cookie crumbs
- Certain candies
This prevents moisture from softening decorations overnight.
Give yourself a little time before guests arrive.
Trying to write “RIP” on six tiny cookies while answering the door is an unnecessarily specific form of stress.
How Much Cake Do You Need for a Halloween Party?
An 8-inch two-layer cake usually gives around 12 to 16 party servings, depending on how generously you cut it.
A 9-by-13-inch cake can usually give around 15 to 24 servings, depending on portion size.
If you’re serving several Halloween desserts, smaller cake pieces are enough.
For a large party, a sheet cake is often easier than making multiple layer cakes.
It is also easier to transport.
A graveyard cake in a rectangular pan is considerably less exciting in the passenger seat than a three-layer monster cake sliding toward the door.
That is a compliment.
Halloween Cake Variations
Once you have a reliable cake base, you can change the theme without changing the recipe.
Mummy Cake
Cover a chocolate cake with irregular strips of white buttercream.
Leave a small opening and add two candy eyes.
Eyeball Cake
Frost the cake white.
Create one large colored frosting iris in the center.
Add a dark pupil and thin red frosting lines.
Bat Cake
Cover a chocolate cake with dark frosting and add simple chocolate bat shapes.
Witch Cake
Use green frosting, dark chocolate decorations, and a small edible witch hat on top.
Vampire Cake
Use white frosting with a dark chocolate drip and small red jam or frosting details.
Black Cat Cake
Cover a round cake with dark chocolate frosting.
Add triangular chocolate ears and candy eyes.
A few simple shapes can completely change the design.
You do not need a different cake recipe for every creature in the Halloween inventory.
Flavor Variations
The decorating gets most of the attention, but the cake underneath can change too.
Try:
- Chocolate cake with vanilla frosting
- Vanilla cake with chocolate frosting
- Pumpkin spice cake with cream cheese frosting
- Red velvet cake
- Chocolate orange cake
- Apple spice cake
- Cookies-and-cream cake
For the pumpkin patch cake, chocolate works especially well because the crumbs resemble soil.
For ghosts and mummies, a dark chocolate cake creates stronger contrast with white frosting.
For a fall-style Halloween cake, pumpkin or apple spice makes sense.
Can You Use Cream Cheese Frosting?
Yes, especially with pumpkin, spice, carrot, or red velvet cake.
Cream cheese frosting needs refrigeration because it is perishable.
Keep the finished cake refrigerated and follow safe storage practices.
Buttercream is often easier when you need detailed piping because it can be made firmer.
For a very detailed monster or pumpkin design, buttercream may give you better control.
Transporting a Halloween Cake
Chill the cake before moving it.
Cold frosting is firmer and less likely to shift.
Place the cake in a proper cake box or covered carrier.
Set it on a flat surface in the vehicle.
A nonslip mat underneath the box can help keep it from sliding.
Do not put a tall cake on a sloped car seat and hope Halloween spirits provide structural support.
For longer trips, keep cakes containing perishable frosting or filling properly chilled.
Add fragile decorations after arriving whenever possible.
Serving Halloween Cake
A Halloween cake works well as the centerpiece of a larger dessert table.
You can surround it with:
- Brownies
- Halloween cookies
- Cupcakes
- Popcorn
- Pretzels
- Fresh fruit
- Candy
If the cake is heavily decorated, keep the surrounding desserts simpler.
You want a dessert table.
Not five desserts competing for the position of regional Halloween manager.
Leftovers and Storage
Storage depends on the cake and frosting.
A basic cake with standard buttercream can generally be kept covered for a short period at cool room temperature, though warm rooms can soften the frosting.
Cakes with cream cheese frosting, whipped cream, custard, or other perishable fillings should be refrigerated.
For refrigerated cake, cover it well so it does not dry out or absorb refrigerator odors.
Plain unfrosted cake layers can also be frozen.
Wrap cooled layers tightly and freeze them for 2 to 3 months for best quality.
Thaw wrapped layers before decorating.
Decorated cakes can sometimes be frozen too, but cookies, candies, and delicate decorations may change texture.
Frequently Asked Questions
What are easy Halloween cake ideas?
Spiderweb cakes, ghost cakes, graveyard cakes, monster cakes, pumpkin patch cakes, mummy cakes, and eyeball cakes are all relatively easy to decorate.
Can I use boxed cake mix for a Halloween cake?
Yes. A boxed mix is an easy shortcut when the decorating is the main focus.
What is the easiest Halloween cake for beginners?
A graveyard sheet cake is particularly easy because chocolate frosting, cookie crumbs, and cookie tombstones do most of the decorating.
Can I make a Halloween cake the day before?
Yes. Most cakes can be baked and decorated ahead, though delicate cookie or candy decorations may be better added closer to serving.
How do I make a spiderweb on a cake?
Pipe concentric circles of contrasting chocolate or frosting, then drag a toothpick from the center toward the outer edge.
How do I stop crumbs getting into my frosting?
Apply a thin crumb coat, chill the cake, then apply the final frosting layer.
What cake flavor is good for Halloween?
Chocolate, pumpkin spice, apple spice, vanilla, red velvet, and chocolate orange all work well.
How do I make a Halloween cake without special tools?
Use a sheet cake, spread frosting with a regular spatula, and decorate with cookies, candy eyes, marshmallows, chocolate, and sprinkles.
Can Halloween cake be frozen?
Plain cake layers freeze well. Wrap them tightly and use within about 2 to 3 months for best quality.
How many people does an 8-inch Halloween cake serve?
A two-layer 8-inch cake generally provides roughly 12 to 16 party portions, depending on how it is sliced.
Wrapping Up
A Halloween cake does not need forty decorations to make the theme obvious.
Give a chocolate cake a white spiderweb and you’re done.
Pipe a few white ghosts onto a simple frosted cake.
Add chocolate drips and candy eyes for a monster cake.
Turn cookie crumbs and biscuits into a graveyard.
Or cover chocolate “soil” with little orange pumpkins for a pumpkin patch cake.
Choose one idea.
Keep the cake itself reliable.
Then let a few easy decorations handle Halloween.
And if one of the ghosts leans slightly to the left or a tombstone refuses to stand straight, leave it.
For once, the decorating mistake has a perfectly reasonable backstory.