Halloween food has a difficult assignment.
It needs to look spooky enough that everyone immediately understands the theme, but it still has to look like something people actually want to eat.
There is a limit to how realistic the fake eyeballs should become.
Sandwiches solve that problem beautifully. They’re familiar, inexpensive, easy to make for a crowd, and surprisingly simple to turn into monsters, ghosts, mummies, spiders, pumpkins, and other Halloween characters without changing the food into an elaborate craft project.
They’re also useful beyond parties. Most of these ideas work for Halloween lunchboxes, after-school snacks, classroom celebrations, or an easy October dinner.
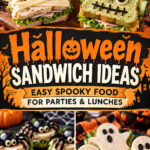
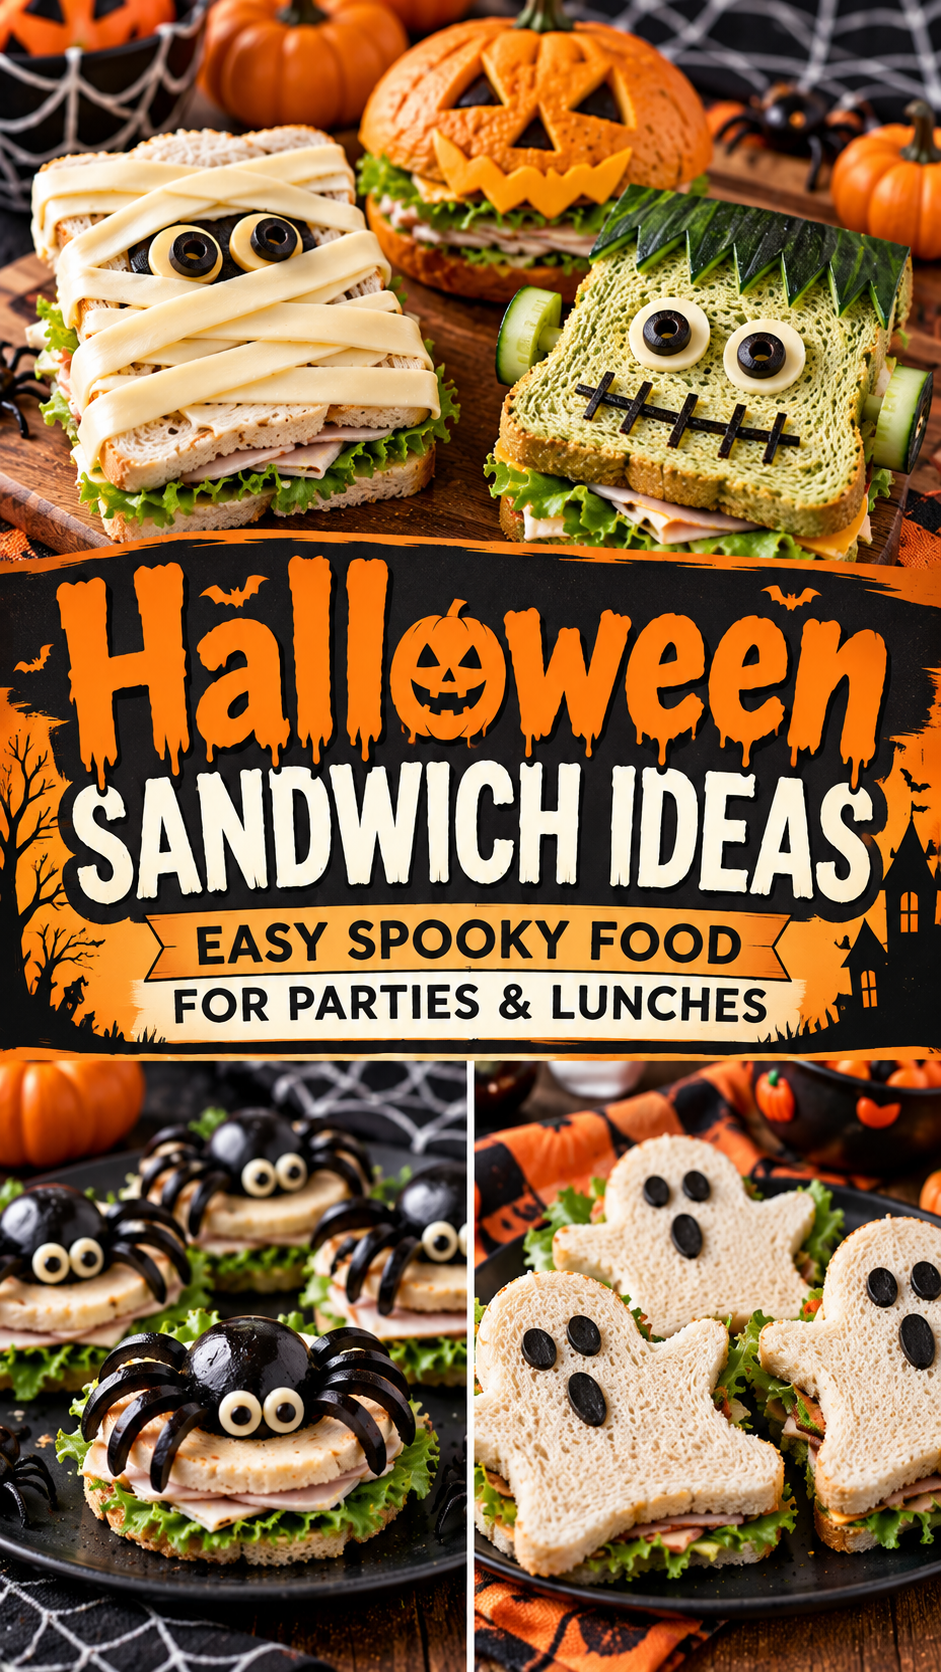
Here are seven Halloween sandwich ideas that are more fun than frightening to make.
Monster Sandwiches With Cheese Teeth
We’ll start with the one that gets the biggest visual payoff for the least amount of work.
These little monsters can be made with almost any sandwich filling your family likes.
For 8 sandwiches:
- 16 slices sandwich bread
- 8 slices cheddar or another sliced cheese
- Turkey or ham
- Lettuce
- Mayonnaise or mustard
- 8 green or black olives
- Toothpicks
Make your sandwiches normally with meat, cheese, lettuce, and whichever condiment you prefer.
Before closing them, position the cheese so a little extends beyond one edge.
Use a knife to cut small triangles along that edge.
Those become the monster’s teeth.
Close the sandwich while leaving the cheese teeth visible.
Cut each sandwich into a square, rectangle, or slightly irregular monster shape.
For the eyes, carefully secure olives on top with toothpicks.
You can use one eye.
You can use two.
A monster with three eyes is also perfectly reasonable Halloween biology.
For children, remove toothpicks before serving or use another age-appropriate decoration that doesn’t create a choking or injury hazard.
These sandwiches are particularly good for parties because you can make different fillings while keeping the same monster design.
Mummy Grilled Cheese
If you’re making Halloween dinner rather than packing lunches, this is the sandwich I’d choose.
It’s warm, cheesy, recognizable, and just spooky enough.
You’ll need:
- 8 slices sturdy sandwich bread
- 8 slices cheddar cheese
- 4 tablespoons softened butter
- 1/2 cup shredded mozzarella
- Sliced black olives
Make four grilled cheese sandwiches using the bread, cheddar, and butter.
Cook until the bread is golden and the cheese inside has melted.
Now turn them into mummies.
Place the sandwiches on a baking sheet.
Arrange thin lines of mozzarella diagonally across each sandwich, leaving a small opening near the top for the face.
Add two small olive pieces for eyes.
Place under the broiler very briefly until the mozzarella begins melting.
Watch them continuously.
You’re looking for mummy bandages, not complete cheese liquefaction.
Serve with warm tomato soup and you’ve got an incredibly easy Halloween dinner.
The soup also looks appropriately dramatic next to the mummy.
We’ll allow everyone to draw their own conclusions about that.
Pumpkin-Shaped Ham and Cheese Sandwiches
Not every Halloween recipe needs eyeballs.
Pumpkin sandwiches are especially useful for younger children or Halloween lunchboxes where you’d rather aim for cute than creepy.
You’ll need:
- Sandwich bread
- Sliced ham
- Cheddar cheese
- Mayonnaise or mustard
- Small spinach leaves or cucumber pieces
Make ham-and-cheese sandwiches as usual.
Then use a pumpkin-shaped cookie cutter to cut each sandwich.
If you don’t have one, use a large round cutter and carefully trim a subtle pumpkin shape with a knife.
Add a tiny piece of cucumber or spinach at the top for a green stem.
That’s it.
You can also use orange cheddar positioned close to the outside of the sandwich so the pumpkin theme is even more obvious.
The scraps don’t need to go into the trash.
Save them for breadcrumbs, croutons, bread pudding, or an immediate kitchen snack.
Cookie cutters are very talented at making one sandwich look adorable while leaving behind enough bread to assemble a second, deeply confusing sandwich.
Spider Sandwiches for a Halloween Party
These work best as small round sandwiches, which makes them ideal for a party platter.
For approximately 12 mini sandwiches:
- 24 small bread rounds
- Peanut butter and jam, or another suitable filling
- Pretzel sticks
- Raisins, blueberries, or sliced olives for eyes
Cut circles from the bread using a cookie cutter.
Spread your chosen filling over half the rounds and close with the remaining bread.
Carefully insert four pretzel pieces along each side to create eight spider legs.
Add two small eyes on top.
For peanut-butter sandwiches, tiny raisin pieces can stick to a very small dab of peanut butter.
If you’re serving these at a school or large party, check for nut restrictions before using peanut butter. Sunflower-seed butter or another suitable alternative may be a better choice depending on your guests.
You can also make savory spiders.
Try cream cheese and cucumber or turkey and cheese, then use thin vegetable strips for legs.
And yes, spiders have eight legs.
This is one Halloween recipe where someone at the party will absolutely count them.
Plan accordingly.
Ghost Sandwiches for Lunchboxes
This may be the easiest idea in the entire collection.
You’ll need:
- White sandwich bread
- Cream cheese
- Thinly sliced cucumber
- Turkey, optional
- Small pieces of black olive
Use a ghost-shaped cookie cutter to cut the bread.
Spread with cream cheese and add cucumber or turkey if desired.
Close the sandwich.
Use tiny pieces of black olive to create two eyes and a mouth.
For a sweeter version, use a suitable nut or seed butter with sliced banana inside.
You can make these as closed sandwiches or leave them open-faced.
The white bread and cream cheese naturally give you the ghost appearance without food coloring.
They’re also considerably faster than attempting to sculpt a ghost from mozzarella.
Some ingredients deserve to remain in their natural geometric state.
Jack-O’-Lantern Quesadilla Sandwiches
Technically we’re stretching the definition of sandwich slightly.
Halloween permits flexibility.
These are especially good for an after-school snack or quick Halloween dinner.
You’ll need:
- 8 small flour tortillas
- 2 cups shredded cheddar
- Cooked shredded chicken, optional
- Black beans, optional
- Salsa for serving
For each quesadilla, take two tortillas.
Use a small sharp knife to carefully cut jack-o’-lantern eyes and a mouth from one tortilla.
Keep the other tortilla intact.
Place the intact tortilla in a skillet.
Add a layer of cheddar and any cooked filling you’re using.
Place the carved tortilla on top.
Cook over medium-low heat until the bottom is golden.
Carefully flip and cook the other side until the cheese has melted.
The orange cheese shows through the carved pumpkin face.
Serve with salsa, guacamole, or sour cream.
For children helping in the kitchen, an adult should handle the knife work and hot skillet.
You can cut several pumpkin faces ahead of time and let everyone choose their favorite expression.
Happy pumpkin.
Angry pumpkin.
Confused pumpkin.
Pumpkin who has just discovered what happened to the other tortillas.
All valid.
Frankenstein Avocado Sandwiches
Here’s one Halloween sandwich that brings some green to the table without food coloring.
For four open-faced sandwiches:
- 4 slices whole-grain or sourdough bread
- 2 ripe avocados
- 1 teaspoon lemon or lime juice
- Salt and black pepper
- Cucumber
- Black olives
- Red bell pepper
Toast the bread lightly.
Mash the avocado with lemon or lime juice, salt, and pepper.
Spread a thick layer across each piece of toast.
Now decorate the face.
Use chopped black olives across the top for Frankenstein’s hair.
Two olive slices can become eyes.
A thin strip of red pepper makes a mouth.
Small cucumber or olive pieces can create the bolts near the sides.
These are best prepared shortly before serving because avocado gradually browns after it’s exposed to air.
The citrus helps slow that process but doesn’t stop it indefinitely.
For a party, make the avocado mixture ahead and keep it refrigerated with plastic wrap pressed directly against its surface. Assemble the faces closer to serving.
Make a Halloween Sandwich Platter
If you’re hosting a party, don’t make 30 elaborate sandwiches individually.
Choose two designs and let the rest of the platter stay simple.
For example, make:
Monster sandwiches with turkey and cheese.
Pumpkin sandwiches with ham and cheddar.
Then fill the platter with easy additions such as:
- Baby carrots
- Cucumber slices
- Grapes
- Pretzels
- Cheese cubes
- Crackers
- Apple slices
Add bowls of dip around the sandwiches.
Suddenly you’ve got a complete Halloween lunch or party spread without turning every grape into an eyeball.
That’s an important distinction.
The theme should make the food more fun.
It shouldn’t make preparing lunch a four-hour event.
Halloween Sandwiches for Kids’ Lunchboxes
For lunchboxes, simplicity matters even more.
A pumpkin-shaped sandwich is usually easier to pack than a monster covered in decorations.
Try combinations such as:
Pumpkin ham and cheese: Cut into a pumpkin shape and add cucumber for the stem.
Ghost turkey sandwich: Use a ghost cutter and simple olive details.
Mini monster sandwich: Make a small cheese sandwich with one row of cheese teeth.
Spider sandwich: Pack the sandwich and pretzel “legs” separately so they don’t become soggy or break before lunch.
Then add naturally Halloween-colored sides.
Orange slices, blackberries, purple grapes, carrots, and blueberries all work without needing artificial coloring.
You can even use a small Halloween napkin or lunchbox note to carry more of the theme.
Not everything in the lunchbox needs a face.
Keep the Bread From Getting Soggy
Halloween sandwiches often need to be prepared before guests arrive, so moisture becomes the enemy.
For meat-and-cheese sandwiches, put cheese or lettuce directly against the bread and keep wet ingredients such as tomato toward the center.
Use condiments lightly.
Pat cucumber and other watery vegetables dry before adding them.
If possible, assemble hot sandwiches close to serving.
For cold party sandwiches, cover the platter tightly and refrigerate until needed.
Cookie-cutter sandwiches can dry out more quickly because they have exposed edges, so don’t leave them uncovered for long periods.
And if you’re packing a lunchbox, use an insulated bag with appropriate cold packs for perishable fillings.
A ghost sandwich is supposed to be pale.
The turkey inside it shouldn’t be warm.
Turn Sandwiches Into a Halloween Dinner
You don’t have to reserve these ideas for children’s parties.
Make Mummy Grilled Cheese and serve it with tomato soup.
Add a simple green salad.
For dessert, put out Halloween brownies or cookies.
Dinner is done.
Another option is a Halloween sandwich bar.
Set out:
- Several types of bread
- Turkey
- Ham
- Cheese
- Lettuce
- Cucumber
- Tomato
- Olives
- Condiments
- Pretzel sticks
Let everyone create their own monster sandwich.
Children get an activity.
Adults get dinner.
You don’t have to individually attach 96 pretzel spider legs.
Everyone wins.
A Few Make-Ahead Tricks
You can do much of the preparation earlier in the day.
Cut cheese into teeth.
Slice olives.
Wash and dry vegetables.
Cut bread shapes.
Prepare sandwich fillings.
Store everything separately in airtight containers in the refrigerator as appropriate.
Then assemble closer to serving.
For sandwiches that need to be made several hours ahead, wrap them tightly or keep the platter well covered.
I’d save avocado sandwiches, grilled cheese, quesadillas, and other hot or easily browned options for closer to serving time.
Monster and pumpkin sandwiches are much more forgiving.
How Many Sandwiches Do You Need for a Halloween Party?
It depends on whether they’re a snack or the meal.
For a party where sandwiches are one of several snacks, plan roughly one small sandwich or two mini pieces per person as a starting point.
If sandwiches are the main meal, plan approximately 1 to 2 standard sandwiches per adult, with smaller amounts for young children, depending on the other foods you’re serving.
For a children’s party, mini sandwiches are particularly useful.
Children can try several foods without receiving an enormous sandwich they’ll take three bites from and abandon somewhere mysterious.
Make several familiar fillings rather than one adventurous option.
Halloween is already providing the surprises.
Lunch doesn’t necessarily need another one.
Food Safety Matters at Halloween Too
Sandwiches containing meat, cheese, eggs, dairy-based spreads, or other perishable ingredients should be kept refrigerated at 40°F or below until they’re needed.
Don’t leave perishable sandwiches at room temperature for more than 2 hours, or 1 hour when temperatures are above 90°F.
For a long party, put out smaller trays and replenish them from the refrigerator.
Use clean utensils and cutting boards, particularly when working with cooked meat or other ready-to-eat ingredients.
For school lunches, use an insulated lunch bag with cold packs when the sandwich contains perishable foods.
And be careful with decorative toothpicks around young children.
Halloween food can look dangerous.
It doesn’t need to actually be dangerous.
Which Halloween Sandwich Should You Make?
For a Halloween party, make the Monster Sandwiches. They’re easy to recognize, easy to customize, and look great arranged together on a big platter.
For school lunches, Pumpkin Sandwiches win because they’re simple and easy to pack.
For Halloween dinner, make Mummy Grilled Cheese with tomato soup.
For an after-school snack, the Jack-O’-Lantern Quesadillas are hard to beat.
And if you want a healthier option that still looks unmistakably Halloween-ish, make the Frankenstein Avocado Toast.
You don’t need complicated molds, unusual ingredients, or professional decorating skills to make Halloween food memorable.
Start with a sandwich everyone already likes.
Cut the cheese into monster teeth.
Add a couple of olive eyes.
Call it a monster.
And move on to enjoying Halloween rather than spending the entire afternoon trying to convince a cucumber slice to look haunted.