Rice Krispie treats may be one of the most cooperative Halloween desserts you can make.
They don’t need perfect frosting. They don’t need delicate piping. You can cut them into rectangles, dip them in chocolate, add two candy eyes, and suddenly everyone agrees you have created a monster.
That is a very favorable amount of effort for a party dessert.
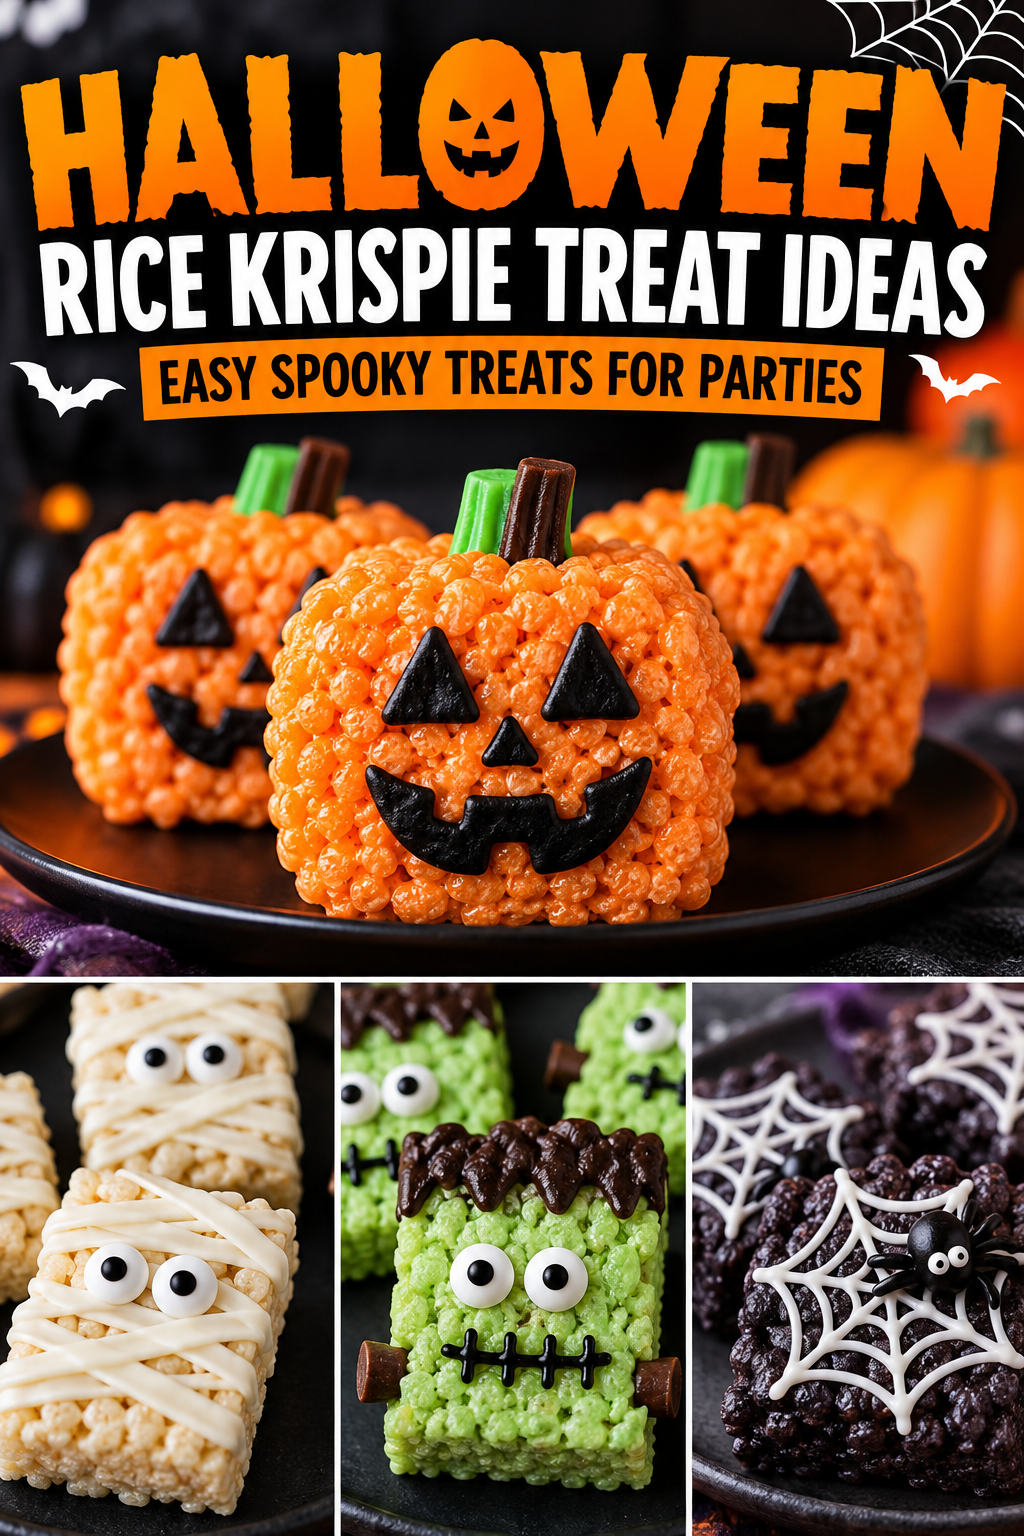
For this batch, we’re making five different Halloween Rice Krispie treat ideas: Frankenstein treats, mummy treats, pumpkin treats, monster treats, and chocolate graveyard treats.
You can make the cereal treats from scratch or start with prepared ones when time is short. Halloween has enough projects already.
What You’ll Need
1. Frankenstein Rice Krispie Treats
- 6 cups crispy rice cereal
- 10 ounces mini marshmallows
- 4 tablespoons unsalted butter
- 1/2 teaspoon vanilla
- Green candy melts or white chocolate tinted green
- Semisweet chocolate
- Candy eyes
- Black decorating icing
2. Mummy Rice Krispie Treats
- 6 cups crispy rice cereal
- 10 ounces mini marshmallows
- 4 tablespoons butter
- 1/2 teaspoon vanilla
- 1 1/2 cups white candy melts or white chocolate
- Candy eyes
3. Pumpkin Rice Krispie Treats
- 6 cups crispy rice cereal
- 10 ounces mini marshmallows
- 4 tablespoons butter
- Orange food coloring
- 1/2 teaspoon vanilla
- Mini pretzel pieces
- Green decorating icing
4. Colorful Monster Treats
- 6 cups crispy rice cereal
- 10 ounces mini marshmallows
- 4 tablespoons butter
- 1/2 teaspoon vanilla
- Purple, green, or orange candy melts
- Candy eyes
- Halloween sprinkles
- Mini chocolate chips, optional
5. Chocolate Graveyard Treats
- 6 cups crispy rice cereal
- 10 ounces mini marshmallows
- 4 tablespoons butter
- 1/2 teaspoon vanilla
- 1 cup semisweet chocolate
- 8 chocolate sandwich cookies
- Small rectangular cookies
- White decorating icing
Tools You’ll Need
Keep the equipment simple:
- Large saucepan
- Wooden spoon or silicone spatula
- 9 x 13-inch baking pan
- Parchment paper
- Large mixing bowl
- Microwave-safe bowls
- Sharp knife
- Piping bag or zip-top bag
A little nonstick spray or butter on your spatula also helps.
Marshmallow has an impressive ability to attach itself to every kitchen object except the cereal you’re currently trying to mix it with.
First, Make the Basic Rice Krispie Treats
Four of the five ideas start with the same base, so it makes sense to get that part right first.
Line a 9 x 13-inch pan with parchment paper and lightly grease it.
Melt 4 tablespoons butter in a large saucepan over low heat.
Add the marshmallows.
Stir gently until completely melted and smooth.
Remove the pan from the heat and stir in vanilla.
Add the crispy rice cereal and fold until evenly coated.
Transfer the mixture to your prepared pan.
Here’s the important part:
Do not aggressively compact it.
Press the cereal mixture into an even layer using lightly buttered hands, parchment paper, or a greased spatula.
You want the treats to hold together without becoming dense enough to qualify as building materials.
Let them set before cutting.
Now we can make them considerably stranger.
Frankenstein Rice Krispie Treats
Frankenstein treats work especially well because a rectangle already gives you most of the shape.
No cookie cutter required.
Create the Green Face
Cut your cereal treats into rectangles.
Melt the green candy coating according to the package directions.
Dip roughly the upper two-thirds of each rectangle into the green coating, or spread a thin layer across the front.
Place the treats on parchment paper.
Add two candy eyes while the coating is still wet.
Give Frankenstein Some Hair
Melt the semisweet chocolate.
Dip the very top of each treat into the chocolate.
Use a toothpick or spoon to pull a few uneven points downward for hair.
Once everything has set, use black decorating icing to add a mouth and a couple of small stitches.
Keep the expression simple.
Frankenstein does not require individually drawn eyelashes and realistic facial shading.
Two eyes, hair, stitches. Everyone understands the assignment.
Mummy Rice Krispie Treats
These may be the fastest Halloween treats in the entire group.
Messy decorating is not merely acceptable.
It is useful.
Dip or Drizzle
Cut the cereal treats into rectangles.
Melt the white chocolate or candy melts in short microwave intervals, stirring frequently.
You have two options.
Dip the front of each treat into the white coating for a fuller mummy look, or leave the cereal visible and go directly to the drizzle.
Add the Bandages
Transfer the melted coating to a piping bag or zip-top bag.
Cut a very small opening.
Drizzle irregular lines from side to side across each rectangle.
Add two candy eyes between the lines.
Drizzle a few more lines around the eyes.
Stop there.
Mummies apparently have very relaxed tailoring requirements.
Let the coating set completely before stacking or storing.
Pro Tips Before the Marshmallows Take Over
Keep the heat low. High heat can make the marshmallow mixture harder and less pleasant to work with.
Don’t crush the treats into the pan. Gentle pressure gives you softer bars.
Let the base set before decorating. Warm, flexible treats are much harder to dip neatly.
Melt candy coatings slowly. Short heating intervals are much safer than one ambitious blast in the microwave.
Set out decorations before you start dipping. Candy coatings can firm up surprisingly quickly.
If you’re making these with kids, divide the decorating supplies into small bowls.
One enormous bowl of candy eyes tends to become less of a decorating station and more of an archaeological dig.
Pumpkin Rice Krispie Treats
These are a little different because the orange color goes directly into the marshmallow mixture.
That gives you orange treats without having to cover the entire surface in candy coating.
Color the Mixture
Melt the butter and marshmallows over low heat.
Remove from the heat.
Stir in vanilla and a small amount of orange food coloring.
Add more color gradually until you get the shade you want.
Fold in the cereal.
Shape the Pumpkins
Instead of pressing the mixture into a baking pan, let it cool just enough to handle safely.
With lightly buttered hands, form it into small pumpkin-shaped rounds.
Don’t squeeze too firmly.
Add a short pretzel piece to the top as a stem.
Once the pumpkins have cooled and set, pipe a tiny green leaf or vine beside each pretzel.
They do not need to be perfectly round.
Nature rarely produces twelve pumpkins with suspiciously identical measurements.
Colorful Monster Rice Krispie Treats
This is the recipe to choose when children are helping.
There isn’t much to get wrong.
In fact, the stranger each monster looks, the better the finished platter usually becomes.
Pick Your Monster Colors
Cut the cereal treats into rectangles or squares.
Melt purple, green, or orange candy coating.
Dip one end of each treat into the coating.
You can also spread the coating across the front if that is easier.
Add the Faces
While the coating is still wet, add:
- Candy eyes
- Halloween sprinkles
- Mini chocolate chips
Use one eye on some monsters and three on others.
Put the eyes at different angles.
Give a few monsters chocolate-chip teeth.
There is no monster committee checking anatomical accuracy.
Let the coating set before transferring everything to a platter.
If you’re making several dozen treats, use two or three colors. The finished tray will look varied without requiring a completely different decorating plan for every piece.
Chocolate Graveyard Rice Krispie Treats
These take a few extra minutes, but they make a fun centerpiece for a Halloween dessert platter.
Chocolate provides the ground.
Crushed cookies provide the dirt.
And a small cookie gets promoted to gravestone.
Make the Dirt
Crush the chocolate sandwich cookies.
You want a mixture of fine crumbs and a few tiny pieces.
Melt the semisweet chocolate.
Spread a thin layer across the top of each cereal treat.
Immediately sprinkle cookie crumbs over the chocolate.
Add the Gravestones
Take the small rectangular cookies and pipe a simple RIP on each with white decorating icing.
Press one gently into the top of each treat while the chocolate is still soft enough to hold it.
Let everything set.
That’s enough decoration.
Do not start adding fences, pathways, shrubbery, and individually named residents unless you have considerably more Halloween afternoon available than the rest of us.
At some point a dessert graveyard begins developing municipal planning requirements.
Change the Designs Without Making Another Batch
Once you have a pan of cereal treats, you can create several Halloween designs from the same batch.
That is especially useful for parties.
Try cutting some treats into smaller squares and decorating them as mini monsters.
Use melted dark chocolate with white icing to make spiderweb treats.
Add orange and black sprinkles for the simplest possible version.
Or use a ghost-shaped cookie cutter while the treats are still slightly soft, then coat the shapes with white chocolate.
Save the scraps from cookie-cutter designs.
They may not be pretty, but they remain entirely qualified for kitchen quality control.
For flavor changes, try adding a little cinnamon to pumpkin treats or dipping one corner of the monster treats in chocolate.
Avoid adding so many extras that the cereal treat disappears underneath them.
Halloween chaos works better when it has some supervision.
Make Them Ahead Without Losing the Texture
Rice Krispie treats are convenient party food because most of the work can happen before guests arrive.
Make the cereal base one day ahead and keep it tightly covered.
You can also decorate most designs the night before.
The graveyard version is slightly better when the cookie gravestones are added closer to serving because cookies can soften during storage.
If you’re preparing several designs, make one large batch of cereal treats and divide it before decorating.
Pumpkin treats are the exception because the orange coloring needs to go into the warm marshmallow mixture.
Have all your decorations ready before beginning.
Searching through a cabinet for candy eyes while melted chocolate slowly becomes solid again is an unnecessarily specific form of Halloween stress.
Serving These at a Halloween Party
A 9 x 13-inch pan can usually be cut into around 15 to 24 treats, depending on how large you make them.
For a dessert table with cookies, cupcakes, candy, and other snacks, smaller squares are plenty.
You can also insert paper treat sticks into thicker bars for easy serving.
Arrange different designs together on a large platter.
A mix of green Frankensteins, white mummies, orange pumpkins, colorful monsters, and chocolate graveyards creates plenty of variety without requiring five completely different desserts.
For a children’s party, keep age-appropriate food safety in mind.
Some candy decorations, hard candies, whole nuts, popcorn, large marshmallows, and firm or chewy toppings can be choking hazards for very young children.
Use simpler decorations such as melted chocolate, icing, or suitable sprinkles when serving younger kids.
Check packaged ingredients carefully when food allergies are a concern.
The Halloween surprise should be the costume.
Not discovering what was hiding in the topping.
Storage and Leftovers
Store plain or chocolate-decorated cereal treats in an airtight container.
For the nicest texture, they’re usually best within the first couple of days.
Place parchment or wax paper between layers so decorated surfaces do not stick together.
Avoid refrigeration unless your chosen toppings require it. Cold storage can make ordinary cereal treats firmer.
If you add a perishable topping such as cream cheese frosting, keep those treats refrigerated at 40°F or below.
Perishable foods should not sit at room temperature longer than 2 hours, or 1 hour when temperatures are above 90°F.
Freezing is possible, though decorated treats may not look quite as neat after thawing.
For a Halloween party, making them fresh a day ahead is usually easier.
Frequently Asked Questions
Can I use store-bought Rice Krispie treats?
Yes. They’re especially convenient when the main goal is decorating rather than making the cereal base.
Why are my homemade cereal treats hard?
Too much heat, too little marshmallow, or pressing the mixture too firmly into the pan can create hard treats.
How do I stop the mixture from sticking to my hands?
Lightly butter or grease your hands before shaping or pressing it.
Which Halloween design is easiest?
Mummy and monster treats are probably the simplest because uneven decorations actually work in their favor.
Can kids help decorate them?
Yes. Older children can add eyes, sprinkles, cookie crumbs, and other suitable decorations. Adults should handle hot marshmallow mixtures and supervise melted coatings.
Can I make Halloween Rice Krispie treats the night before?
Yes. Keep them tightly covered so they don’t dry out.
Can I make them without candy melts?
Yes. Melted white, milk, or dark chocolate can be used for many of the designs.
How do I get clean squares?
Let the cereal mixture set before cutting and use a sharp knife lightly coated with nonstick spray or butter.
How many treats does one pan make?
A 9 x 13-inch pan generally gives around 15 large treats or 20 to 24 smaller party portions.
Wrapping Up
Halloween Rice Krispie treats are useful when you want the dessert table to look festive without spending an afternoon piping tiny buttercream ghosts.
Turn green treats into Frankenstein faces.
Drizzle white chocolate over mummy treats.
Shape orange cereal mixture into little pumpkins.
Give the kids a bowl of candy eyes and make colorful monsters.
Or bring out the chocolate and cookie crumbs for mini graveyard treats.
You can even make several designs from one basic batch, which is considerably more practical than preparing five separate Halloween desserts.
And if one monster ends up with an eye where an eye probably shouldn’t be?
Good.
It finally looks properly spooky.
If you make these Halloween Rice Krispie treat ideas, leave a comment and tell me which design disappeared first at your party, or share any questions below.