Marshmallows are almost suspiciously well suited to Halloween.
They’re already ghost-shaped if you’re willing to be generous about anatomy. They stick to chocolate, hold candy eyes without complaint, and can become monsters, pumpkins, spiderwebs, or little spooky pops with very little decorating skill.
More importantly, these are party treats, not weekend baking projects.
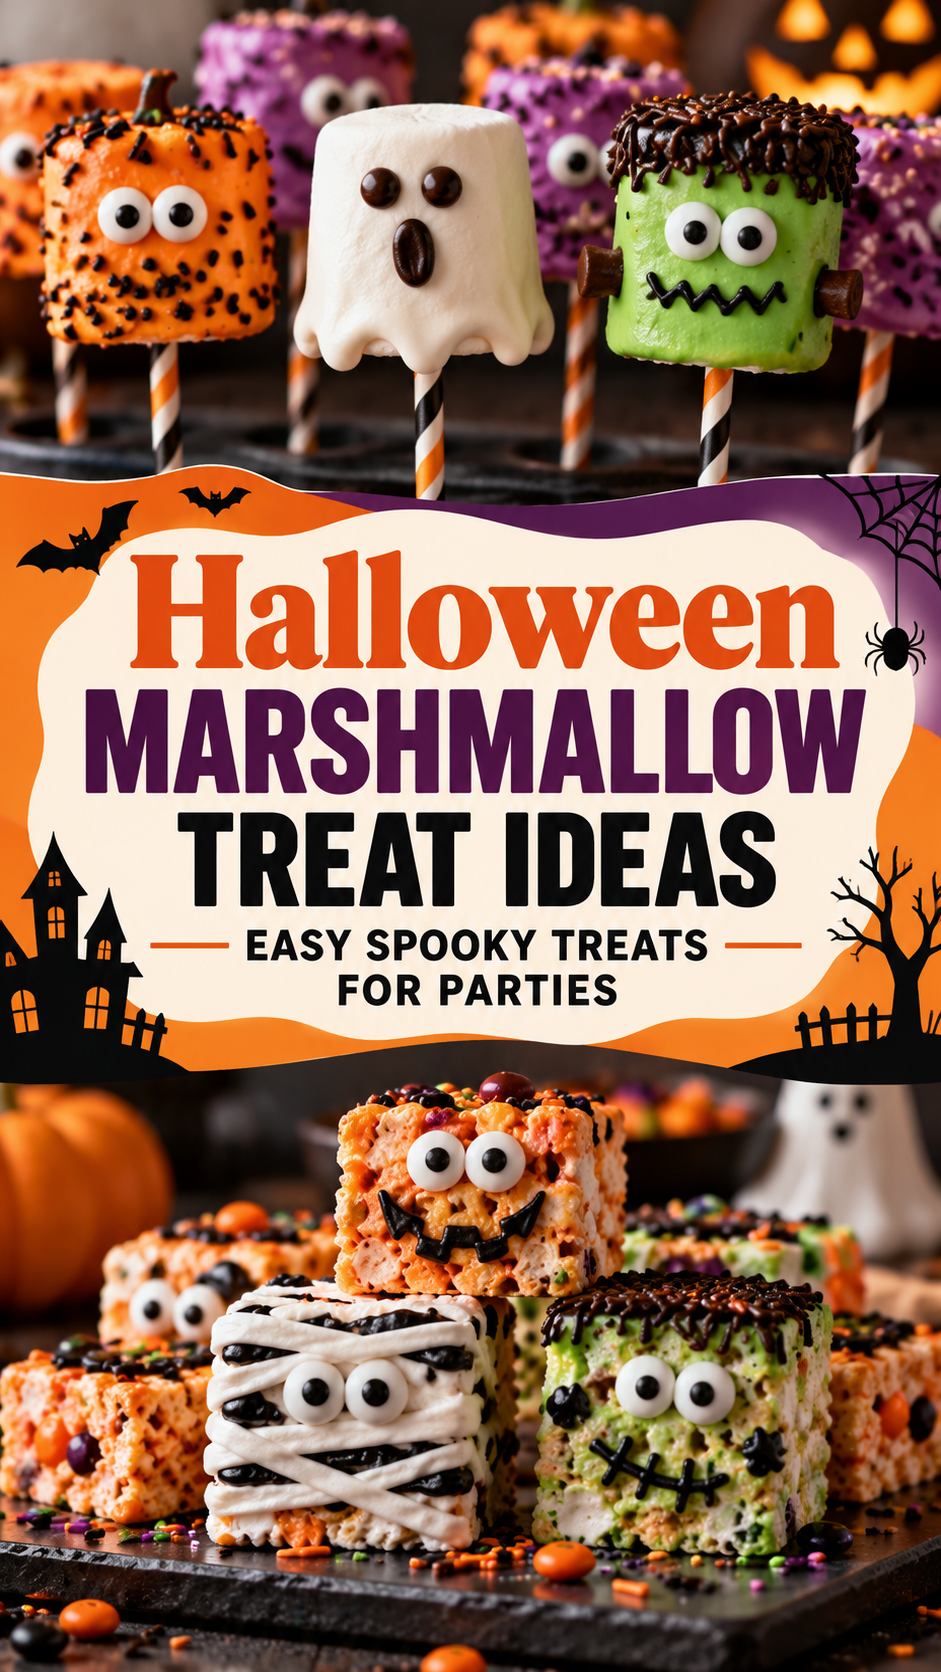
Here are five easy ideas with different looks: ghost marshmallow pops, monster marshmallows, chocolate spiderweb clusters, pumpkin marshmallow bites, and Halloween s’mores bark.
What You’ll Need
Ghost Marshmallow Pops
- 20 large marshmallows
- 10 ounces white candy melts or white chocolate
- 40 mini chocolate chips
- 20 lollipop sticks or paper straws
- 2 ounces semisweet chocolate
Colorful Monster Marshmallows
- 20 large marshmallows
- 8 ounces green, purple, or orange candy melts
- Candy eyes
- Halloween sprinkles
- Mini chocolate chips, optional
- 20 paper straws or treat sticks, optional
Chocolate Spiderweb Marshmallow Clusters
- 3 cups mini marshmallows
- 10 ounces semisweet chocolate
- 1/2 cup crushed pretzels
- 4 ounces white chocolate
- Candy spiders or Halloween sprinkles, optional
Pumpkin Marshmallow Bites
- 20 large marshmallows
- 10 ounces orange candy melts
- 20 small pretzel pieces
- Green decorating icing
- 2 ounces semisweet chocolate, optional
Halloween S’mores Bark
- 12 ounces semisweet or dark chocolate
- 1 1/2 cups mini marshmallows
- 4 graham cracker sheets, broken into pieces
- 1/3 cup orange candy melts
- Halloween sprinkles
- Candy eyes, optional
Tools You’ll Need
The equipment list is pleasantly short:
- Parchment-lined baking sheets
- Microwave-safe bowls
- Rubber spatula
- Forks or dipping tools
- Small piping bag or zip-top bag
- Sharp knife
- Measuring cups
Set everything out before melting the chocolate.
Chocolate has very little interest in waiting while you search three cabinets for the candy eyes you definitely bought.
Ghost Marshmallow Pops
We’ll start with a treat that requires almost no artistic interpretation.
White marshmallow. White coating. Two eyes.
Ghost.
Halloween has accepted weaker evidence.
Push a treat stick into each marshmallow.
Melt the white candy coating according to package directions, stirring frequently until smooth.
Dip each marshmallow until completely covered. Let the excess coating drip back into the bowl.
Place the pops on parchment.
Before the coating sets, add two mini chocolate chips for eyes.
Melt the semisweet chocolate and transfer it to a tiny piping bag. Add a small mouth if you want each ghost to have more personality.
Let everything set completely.
You don’t need identical expressions. A crooked mouth or uneven eyes actually works rather well here.
A collection of twenty perfectly symmetrical ghosts would be considerably more suspicious.
Colorful Monster Marshmallows
Monster treats are useful when children want to help because accuracy becomes completely unnecessary.
One eye?
Monster.
Five eyes?
Also monster.
An eye mysteriously attached to the side?
Halloween remains willing to approve the design.
Melt your colored candy coating.
Insert sticks into the marshmallows if you’re making pops, or leave them off for simple bites.
Dip each marshmallow partially or completely into the coating.
Immediately add candy eyes and sprinkles before the coating hardens.
Use mini chocolate chips for mouths, horns, or whatever else your particular monster seems to require.
Place on parchment and let set.
For a party platter, use two or three coating colors rather than making every monster identical.
It creates variety without giving you five separate decorating projects.
Pro Tips Before the Chocolate Starts Setting
Work in small batches. Melt one coating color at a time so you’re not trying to keep four bowls fluid simultaneously.
Keep water away from melted chocolate. Even a small amount can cause problems with the texture.
Prepare decorations first. Open the sprinkles, candy eyes, and pretzels before dipping begins.
Use parchment paper. Set treats directly on it and cleanup becomes much easier.
Don’t chase perfection. Halloween treats benefit from being a little uneven.
If a monster has an unexpected number of eyes, leave it.
There is no marshmallow biology exam at the party.
Chocolate Spiderweb Marshmallow Clusters
These are less cute and a little messier, which gives the treat table some useful contrast.
The mini marshmallows make the clusters soft and chewy while pretzels add crunch.
Melt the semisweet chocolate until smooth.
Let it cool for a minute so it isn’t extremely hot when it meets the marshmallows.
Combine the mini marshmallows and crushed pretzels in a bowl.
Pour over enough melted chocolate to coat everything and fold gently.
Spoon small clusters onto parchment.
Melt the white chocolate and place it in a piping bag with a very small opening.
Pipe thin lines across each cluster in loose web patterns.
You can add a candy spider or Halloween sprinkles before the chocolate sets.
Let the clusters firm completely before moving them.
And don’t spend ten minutes trying to create geometrically correct webs.
Spiders have had millions of years to practice.
You have dessert to finish.
Pumpkin Marshmallow Bites
These aren’t pumpkin flavored.
They’re marshmallows dressed as pumpkins, which is a considerably easier arrangement.
Melt the orange candy coating according to package directions.
Dip each marshmallow until covered.
Place it on parchment and immediately insert a tiny pretzel piece into the top for the stem.
Once the orange coating sets, use green icing to add a small leaf or vine.
For jack-o’-lanterns, melt a little semisweet chocolate and pipe simple faces onto the front.
Keep the faces basic.
Two eyes and a mouth will get the message across.
Trying to give a marshmallow pumpkin realistic facial shading is how a 20-minute party treat develops unreasonable ambitions.
Let everything set before arranging the pumpkins on a platter.
Halloween S’mores Bark
This one solves two problems.
First, it gives you a Halloween treat that doesn’t require decorating individual pieces.
Second, broken bark is supposed to be irregular.
There is no cutting ruler involved.
Line a baking sheet with parchment.
Melt the semisweet or dark chocolate.
Spread it into an even layer about 1/4 inch thick.
Immediately scatter mini marshmallows and broken graham crackers over the chocolate.
Press them gently into the surface.
Melt the orange candy coating and drizzle it across the bark.
Add sprinkles and a few candy eyes if using.
Let the bark set completely before breaking it into pieces.
For firmer bark, refrigerate it briefly.
Keep the topping reasonable. You should still be able to see chocolate underneath.
At some point bark covered with marshmallows, crackers, candy eyes, sprinkles, cookies, and half the candy bowl stops being bark and becomes an edible lost-and-found box.
Easy Variations
Once you have marshmallows and melted chocolate, there are plenty of ways to change these treats.
Use milk, dark, or white chocolate based on your preference.
Crushed chocolate sandwich cookies can become edible “dirt” around ghost pops.
Use purple coating for witches or green coating for Frankenstein-inspired marshmallows.
For a simpler treat, dip only half of each marshmallow and add Halloween sprinkles.
You can also sandwich marshmallows between graham crackers, dip one side in chocolate, and decorate them as little Halloween s’mores.
For a sweet-and-salty version, add pretzel pieces to the s’mores bark.
Just resist adding every available Halloween topping to every recipe.
Candy corn, cookie crumbs, pretzels, gummy candy, sprinkles, chocolate chips, and six candy eyes technically fit on one marshmallow.
The marshmallow may disagree.
Make-Ahead Tips for Party Day
Most of these treats are good candidates for advance preparation.
The ghost pops, monsters, pumpkins, and chocolate clusters can generally be made a day ahead and stored once completely set.
S’mores bark can also be prepared in advance.
Keep treats in an airtight container in a cool, dry place unless a particular coating or added ingredient requires refrigeration.
Humidity is the enemy here.
Marshmallows can become sticky, while pretzels and graham crackers can lose their crunch.
If you’re making several designs, prepare one recipe completely before moving to the next.
Five partially finished decorating stations may look productive.
Mostly they produce five bowls of chocolate that all decide to harden simultaneously.
A Quick Note for Kids’ Parties
Marshmallow treats need a little extra thought when very young children are attending.
Whole marshmallows can be a choking hazard for young children. Large, sticky pieces can be difficult to chew and swallow safely.
Hard candy, whole nuts, large candy decorations, and similar toppings can also present choking risks.
Treat sticks create another consideration. Supervise young children and consider serving age-appropriate versions without sticks.
If allergies are a concern, read the labels on chocolate, candy melts, marshmallows, sprinkles, pretzels, graham crackers, and decorations. Packaged candies may contain common allergens or carry cross-contact warnings.
Halloween surprises belong in costumes.
The ingredient list can remain completely predictable.
Leftovers and Storage
Let every chocolate-coated treat set completely before storing it.
Use an airtight container and separate layers with parchment paper.
Avoid stacking delicate decorations directly against one another.
For best texture, these treats are generally better made close to the party rather than weeks ahead.
Pretzels and graham crackers are particularly sensitive to moisture.
Don’t leave any version containing perishable additions at room temperature for longer than 2 hours, or 1 hour if the temperature is above 90°F.
Plain marshmallow-and-chocolate treats usually don’t need refrigeration, assuming all ingredients are shelf-stable. Check the storage instructions for the specific products you’re using.
Frequently Asked Questions
What can I make with marshmallows for Halloween?
Ghost pops, monsters, pumpkins, chocolate clusters, s’mores bark, dipped marshmallows, and simple decorated s’mores all work well.
Can I use regular chocolate instead of candy melts?
Yes. Regular chocolate works well, though candy melts are often easier when you want bright Halloween colors.
Why is my melted chocolate too thick for dipping?
Overheating can cause problems. Melt it gently in short intervals and stir frequently. Follow package instructions for candy melts.
Can I make these treats the night before?
Yes. Most can be prepared one day ahead if stored properly after the coating has completely set.
How do I keep marshmallow treats from sticking together?
Let the coating harden fully and place parchment between layers when storing.
What’s the easiest recipe for a large party?
Halloween s’mores bark is particularly quick because you decorate one large sheet and break it into pieces instead of decorating every serving individually.
Wrapping Up
Marshmallows make Halloween treats considerably easier because they don’t need much convincing to look spooky.
Turn them into ghost pops with white chocolate, give monster marshmallows as many eyes as you feel like dealing with, or make orange pumpkin bites for a colorful party platter.
For something less decorative, make chewy chocolate spiderweb clusters or a big sheet of Halloween s’mores bark and let everyone choose their own piece.
Nothing here requires advanced decorating skills.
In fact, a slightly crooked ghost, confused-looking monster, or pumpkin with questionable facial proportions may improve the final result.
Halloween is unusually supportive of imperfect desserts.
If you try one of these Halloween marshmallow treat ideas, leave a comment and tell me which one you made, or share any questions below.