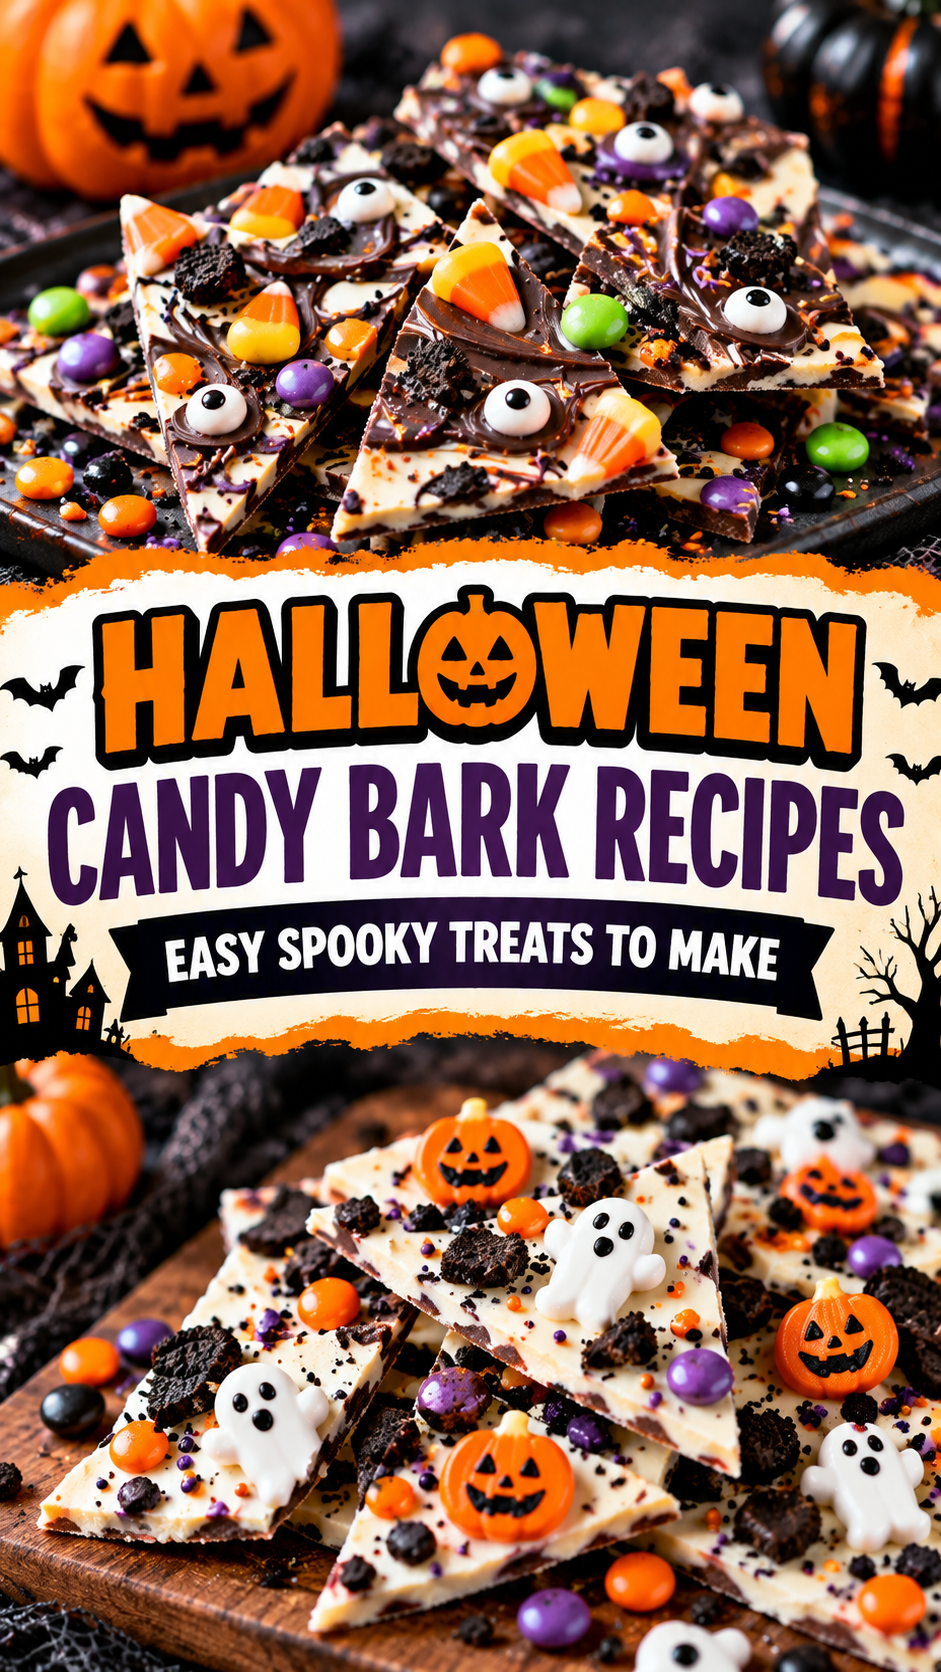
Candy bark is one of the easiest Halloween treats to make look impressive without requiring much actual decorating skill.
Melt chocolate.
Spread it out.
Add candy, cookies, pretzels, sprinkles, or whatever spooky extras fit the theme.
Let it set.
Break it into pieces.
That is a very favorable effort-to-dessert ratio.
These five Halloween candy bark recipes are colorful, crunchy, party-friendly, and easy to make ahead: monster bark, cookies-and-cream ghost bark, pumpkin patch bark, spooky pretzel bark, and Halloween candy overload bark.
Most take less than 20 minutes of active work.
The refrigerator handles the difficult part.
What You’ll Need
1. Monster Halloween Bark
- 12 ounces white chocolate or white candy melts
- Green gel or oil-based food coloring, if using white chocolate
- 1/2 cup purple candy melts
- 1/2 cup orange candy melts
- Candy eyes
- Halloween sprinkles
- Mini chocolate chips
- 1/3 cup chopped chocolate sandwich cookies
2. Cookies-and-Cream Ghost Bark
- 12 ounces white chocolate
- 6 chocolate sandwich cookies, roughly chopped
- 2 ounces dark or semisweet chocolate
- Mini chocolate chips
- 1/4 cup black and white sprinkles, optional
- Pinch of flaky salt, optional
3. Pumpkin Patch Candy Bark
- 12 ounces white chocolate
- 1/2 cup orange candy melts
- 1/3 cup green candy melts
- Candy pumpkins
- 1/2 cup crushed chocolate sandwich cookies
- 1/4 cup mini pretzels, broken into pieces
- Halloween sprinkles, optional
4. Spooky Pretzel Halloween Bark
- 10 ounces semisweet chocolate
- 6 ounces white chocolate
- 1 cup mini pretzels
- 1/2 cup candy-coated chocolates
- Candy eyes
- 1/3 cup chopped peanut-free chocolate candy, optional
- Halloween sprinkles
- Flaky salt, optional
5. Halloween Candy Overload Bark
- 12 ounces milk or semisweet chocolate
- 4 ounces white chocolate
- 1/2 cup chopped chocolate candy bars
- 1/2 cup candy-coated chocolates
- 1/2 cup crushed cookies
- 1/2 cup mini pretzels
- 1/4 cup candy corn
- Halloween sprinkles
- Candy eyes, optional
Tools You’ll Need
- Large baking sheet
- Parchment paper
- Microwave-safe bowls
- Rubber spatula
- Spoon
- Small piping bag or zip-top bag
- Sharp knife
- Cutting board
A food thermometer is not necessary here.
A little patience with melted chocolate is considerably more useful.
Chocolate can go from smooth to grainy surprisingly quickly if overheated.
1. Monster Halloween Bark
This is the bark to make when you want bright Halloween colors and very little concern about neatness.
Green, purple, orange, candy eyes, cookie chunks.
Monsters are not known for restrained design choices.
Prepare the Pan
Line a baking sheet with parchment paper.
Have all the toppings ready before melting the chocolate.
Once the chocolate is spread, you want to decorate while it is still soft.
This is not the time to discover the candy eyes are still sealed inside three layers of packaging.
Melt the Base
Place the white chocolate in a microwave-safe bowl.
Microwave in 20-second intervals, stirring thoroughly after each one.
Stop when it is almost completely melted.
Keep stirring until smooth.
If you want a green base, use an appropriate chocolate-safe coloring.
Regular water-based liquid food coloring can cause real chocolate to seize.
Candy melts are less fussy and can be easier for brightly colored bark.
Spread and Swirl
Spread the melted chocolate into a rough rectangle about 1/4 inch thick.
Melt the purple and orange candy melts separately.
Drizzle small spoonfuls over the green or white base.
Use a toothpick to make a few loose swirls.
Keep them messy.
A monster bark with perfect symmetry feels suspicious.
Decorate
Scatter over:
- Candy eyes
- Cookie pieces
- Mini chocolate chips
- Halloween sprinkles
Press larger toppings down lightly.
Refrigerate for about 20 to 30 minutes, or until firm.
Break into irregular pieces.
Uneven pieces are part of the plan.
2. Cookies-and-Cream Ghost Bark
This version has a black-and-white look that feels spooky without needing neon colors.
White chocolate becomes the background.
Dark chocolate becomes the ghost faces.
Cookie pieces add crunch.
Melt the White Chocolate
Line a baking sheet with parchment.
Melt the white chocolate in short microwave intervals, stirring between each.
Spread it into a thin layer.
Add the Cookies
Scatter chopped chocolate sandwich cookies over the surface.
Press them down gently.
Leave some open white areas for the ghosts.
Make the Ghosts
Melt the dark chocolate.
Spoon it into a small piping bag.
Pipe simple faces onto some of the larger white areas.
Two eyes.
One mouth.
Done.
Do not begin adding cheekbones.
Ghosts have survived centuries without detailed facial structure.
You can also add mini chocolate chips as eyes if that is easier.
Chill
Add a few sprinkles or a tiny pinch of flaky salt if using.
Chill until firm.
Break into pieces.
This bark looks especially good on a dark serving platter.
Pro Tips for Better Halloween Candy Bark
Prepare toppings first. Bark starts setting quickly once spread.
Melt chocolate slowly. Short bursts and frequent stirring reduce the chance of scorching.
Keep water away from melted chocolate. Even a small amount can make real chocolate seize.
Do not overload every inch. Leave some visible chocolate between toppings so the bark actually holds together.
Press large toppings gently into the chocolate. This helps them stay attached after the bark sets.
And do not chase perfect pieces.
Candy bark is one dessert where breaking your work apart is the final instruction.
Very forgiving.
3. Pumpkin Patch Candy Bark
This one is more cute than creepy.
Orange swirls, chocolate-cookie “soil,” green drizzle, and candy pumpkins make it ideal for Halloween parties with younger kids or for a fall dessert table.
Make the Base
Melt the white chocolate.
Spread it onto a parchment-lined baking sheet.
Add Orange Swirls
Melt the orange candy melts.
Drop small spoonfuls over the white base.
Drag a toothpick through them gently.
A few swirls are enough.
If the entire tray becomes solid orange, the pumpkin patch has lost its zoning plan.
Add the Soil
Sprinkle crushed chocolate cookies across parts of the bark.
Do not completely cover the surface.
Think patches of dirt rather than full excavation.
Add Pumpkins and Vines
Place candy pumpkins across the bark.
Break a few mini pretzels into small pieces and scatter them around for crunch.
Melt green candy melts and drizzle thin lines between the pumpkins.
These become the vines.
Add sprinkles if you like.
Set
Chill for about 20 to 30 minutes.
Break into pieces so each serving has some pumpkin, cookie crumb, or green drizzle.
For very young children, use age-appropriate decorations and avoid hard candies that may present a choking hazard.
4. Spooky Pretzel Halloween Bark
Sweet chocolate and salty pretzels are an easy combination to like.
This bark also travels well, which makes it useful for potlucks and Halloween parties.
Melt the Chocolate
Melt the semisweet chocolate slowly.
Spread it across the lined baking sheet.
Melt the white chocolate separately.
Drizzle it over the dark chocolate.
Use a toothpick to make loose spiderweb-style lines if you want.
No need for mathematical precision.
Spiders have never issued piping guidelines.
Add the Toppings
Scatter over:
- Mini pretzels
- Candy-coated chocolates
- Candy eyes
- Chopped chocolate candy
- Halloween sprinkles
Press larger toppings lightly into the surface.
Add a tiny amount of flaky salt if your pretzels are not very salty.
Chill and Break
Refrigerate until firm.
Break into pieces.
Aim for a mixture of larger and smaller pieces.
The small ones are useful for grazing.
The large ones mysteriously attract anyone who says they only wanted “a little bit.”
5. Halloween Candy Overload Bark
This is the useful recipe for dealing with several half-open bags of Halloween candy.
It is also excellent after trick-or-treating when there is suddenly enough candy in the house to establish a small retail operation.
The key is choosing toppings that actually work together.
Choose the Candy
Good options include:
- Chocolate bars
- Candy-coated chocolates
- Peanut butter cups, when allergy considerations allow
- Candy corn
- Pretzels
- Cookies
- Toffee pieces
Avoid piling in every single candy available.
Gummy candy, sour candy, mint candy, chocolate, caramel, and candy corn technically can all share one tray.
That does not mean they have reached a successful diplomatic agreement.
Make the Base
Melt the milk or semisweet chocolate.
Spread into an even layer.
Melt the white chocolate.
Drizzle over the top.
Swirl lightly.
Add the Candy
Scatter chopped candy, cookie pieces, pretzels, candy-coated chocolates, and candy corn across the surface.
Add sprinkles and candy eyes.
Press everything gently into the chocolate.
Chill until firm.
Break into pieces.
This bark is rich, so smaller pieces usually work better.
People can always return.
Halloween candy has never required a one-serving policy.
Which Halloween Candy Bark Should You Make?
| Bark | Flavor | Look | Best For |
|---|---|---|---|
| Monster Bark | Sweet + crunchy | Bright and colorful | Kids |
| Ghost Bark | Cookies and cream | Black + white | Spooky parties |
| Pumpkin Patch | Sweet + salty | Cute fall theme | Family parties |
| Pretzel Bark | Sweet + salty | Classic Halloween | Crowds |
| Candy Overload | Mixed candy | Bold and colorful | Leftover candy |
For the easiest kid-friendly option, make monster bark.
For something more polished, try ghost bark.
For a fall-and-Halloween mix, make pumpkin patch bark.
For sweet and salty, choose the pretzel bark.
And when the candy bowl has become a storage problem, Halloween candy overload bark has arrived with a solution.
Real Chocolate vs. Candy Melts
Both work, but they behave differently.
Real Chocolate
Real chocolate usually has better flavor.
Good choices include:
- Semisweet chocolate
- Milk chocolate
- Dark chocolate
- White chocolate
If you want a glossy finish and a firm snap at room temperature, properly tempering real chocolate gives the best result.
For casual bark, you can simply melt it and refrigerate until firm.
It may soften more quickly at room temperature.
Candy Melts
Candy melts are easier for bright colors.
They set firmly and do not require tempering.
The flavor is usually sweeter and less chocolate-forward.
They are particularly useful for:
- Orange drizzle
- Purple swirls
- Green monster bark
- Decorative details
Using both is completely fine.
Halloween is not checking ingredient passports.
How to Melt Chocolate Without Burning It
The microwave is the easiest option.
Place chopped chocolate in a dry microwave-safe bowl.
Heat for 20 seconds.
Stir.
Repeat.
As the chocolate becomes mostly melted, reduce the heating time.
Stop microwaving while a few small pieces remain.
Stir until the residual heat melts them.
Do not keep heating until every piece disappears on its own.
That final extra blast is often where smooth chocolate begins making bad decisions.
You can also use a double boiler.
Keep the bowl dry and make sure steam or water does not get into the chocolate.
Easy Halloween Candy Bark Color Ideas
A simple color palette usually looks better than using every available shade.
Try:
Orange + Black + White
The classic choice.
Green + Purple + Black
Perfect for monsters.
Black + White
Good for ghosts and spiderwebs.
Orange + Green + Brown
Works well for pumpkin patch bark.
Purple + Orange + White
Bright without becoming too busy.
If using colored candy melts, drizzle small amounts rather than covering the entire surface.
The toppings should still be visible.
Easy Halloween Bark Toppings
This is where you can change the recipe without changing the method.
Try:
- Chocolate sandwich cookies
- Pretzels
- Candy eyes
- Candy-coated chocolates
- Candy corn
- Mini marshmallows
- Toffee bits
- Chopped chocolate bars
- Halloween sprinkles
- Candy pumpkins
- Crushed graham crackers
For parties with children, keep choking hazards in mind.
Hard candy, large marshmallows, whole nuts, and other small hard foods may not be appropriate for very young children.
If food allergies are a concern, check every candy and topping label carefully.
Candy assortments can contain unexpected allergens.
Can You Make Halloween Bark Without Candy?
Absolutely.
Use toppings such as:
- Pretzels
- Cookies
- Dried cranberries
- Pumpkin seeds
- Freeze-dried strawberries
- Toasted coconut
- Cereal
- Graham crackers
You can still create Halloween colors with chocolate-safe coloring or colored candy melts.
A few piped chocolate faces can provide the spooky part.
Candy is useful.
It is not legally required for bark citizenship.
Make-Ahead Halloween Party Plan
Candy bark is excellent for making ahead because it does not require last-minute assembly.
Two to Three Days Ahead
Make the bark completely.
Let it set.
Break into pieces.
Store in an airtight container.
Party Day
Arrange the bark on:
- A platter
- A cake stand
- Individual treat cups
- Parchment-lined trays
Keep it somewhere cool.
If the room is warm, return the bark to the refrigerator until closer to serving.
Do not stack delicate decorated pieces too aggressively.
Candy eyes have already seen enough.
How to Make Spiderweb Bark
Spiderweb bark looks much harder than it is.
Spread dark melted chocolate into a rectangle.
Pipe several circles of white chocolate over the surface.
Start with a small circle in the center.
Add larger circles around it.
Take a toothpick and drag lines from the center outward.
Repeat around the bark.
That is the web.
You can also reverse the colors and use dark chocolate over white bark.
Add a candy spider if you have an edible one.
Do not use non-food decorative spiders directly on the bark unless they are food-safe and removed before serving.
How to Keep Bark From Becoming Too Thick
Aim for roughly 1/4 inch of chocolate before adding toppings.
Too thin and the pieces break apart under heavier toppings.
Too thick and one piece begins behaving like an entire chocolate bar.
Spread the melted chocolate with the back of a spoon or offset spatula.
You do not need a perfect rectangle.
Rough edges look fine.
The entire dessert eventually gets deliberately broken anyway.
How Much Halloween Bark Do You Need?
For a party with several desserts, plan on roughly 1 to 2 ounces per person.
For 10 guests, around 1 pound of finished bark is usually plenty alongside other treats.
If bark is the main sweet snack, make more.
Smaller pieces are better for parties because guests can try several varieties.
A tray with two or three different barks also looks impressive without requiring completely different recipes.
Use one chocolate base.
Change the toppings.
Nobody needs to know the production department was highly efficient.
Easy Halloween Bark Gift Bags
Candy bark also works well as a small Halloween gift or party favor.
Once completely set, place pieces into:
- Cellophane treat bags
- Small food-safe paper bags
- Mini gift boxes
- Parchment-lined tins
Keep pieces relatively flat.
Tie the package with ribbon or twine.
If you’re giving bark away, consider including allergen information, especially when it contains nuts, peanut candy, dairy, wheat, or soy.
Halloween surprises should involve costumes.
Not ingredient labels.
How to Store Halloween Candy Bark
Store completely set bark in an airtight container.
Place parchment paper between layers if stacking.
For the best texture, keep it in a cool, dry place if the chocolate is properly set and your room is cool.
If your kitchen is warm or the bark softens easily, refrigerate it.
Most bark keeps well for roughly 1 to 2 weeks, though toppings such as pretzels and cookies may lose crispness sooner.
Keep bark away from strong-smelling foods.
Chocolate is very good at collecting aromas it was never invited to collect.
Freezing is possible, but condensation can affect the appearance when thawed.
For Halloween bark, making it a few days ahead is usually easier.
Common Candy Bark Mistakes
Overheating the chocolate. Melt slowly.
Adding wet toppings. Moisture can affect texture and storage.
Waiting too long to decorate. Add toppings before the chocolate sets.
Making the bark too thin. Heavy toppings will fall off.
Adding too many toppings. You still need enough exposed chocolate to hold everything together.
Using the wrong coloring in real chocolate. Water-based coloring can cause problems. Use coloring designed for chocolate or use colored candy melts.
The goal is controlled Halloween chaos.
Not actual kitchen chaos.
Frequently Asked Questions
What is Halloween candy bark?
Halloween candy bark is melted chocolate spread into a thin layer and topped with candy, cookies, pretzels, sprinkles, or other Halloween decorations before being chilled and broken into pieces.
What chocolate is best for candy bark?
Semisweet, milk, dark, and white chocolate all work. Choose good-quality chocolate for the strongest flavor.
Can I use candy melts instead of chocolate?
Yes. Candy melts are especially useful for bright Halloween colors and decorative drizzles.
How long does candy bark take to set?
In the refrigerator, most bark firms up in about 20 to 30 minutes.
Why did my melted chocolate become thick and grainy?
It may have overheated or come into contact with water.
Can Halloween bark be made ahead?
Yes. It is a great make-ahead party treat and can usually be prepared several days before serving.
What can I put on Halloween bark?
Candy eyes, pretzels, cookies, candy corn, chocolate candies, sprinkles, candy pumpkins, or chopped candy bars all work.
Can I make Halloween bark without nuts?
Yes. Use nut-free chocolate and toppings, and check package labels carefully for cross-contact warnings if allergies are a concern.
Does candy bark need to be refrigerated?
Not always. Properly set chocolate bark can be stored somewhere cool and dry, but refrigeration is useful in warm kitchens or when the chocolate softens easily.
How do I break bark into good pieces?
Let it set completely, then break it by hand into irregular pieces. You can also use a knife for cleaner portions.
Wrapping Up
Halloween candy bark is the kind of party treat that looks far more involved than it really is.
Make monster bark when bright colors and candy eyes fit the mood.
Try cookies-and-cream ghost bark for an easy black-and-white Halloween look.
Choose pumpkin patch bark when you want something cute and seasonal.
Make spooky pretzel bark when sweet and salty sounds better than pure sugar.
Or use Halloween candy overload bark when the candy supply has begun occupying more kitchen space than expected.
Melt the chocolate slowly.
Have the toppings ready.
Decorate before it sets.
Then break everything into pieces and pretend the irregular shapes were carefully planned.
Because for candy bark, they actually were.
If you make one of these Halloween candy bark recipes, leave a comment and tell me which version you tried, or drop any questions below.